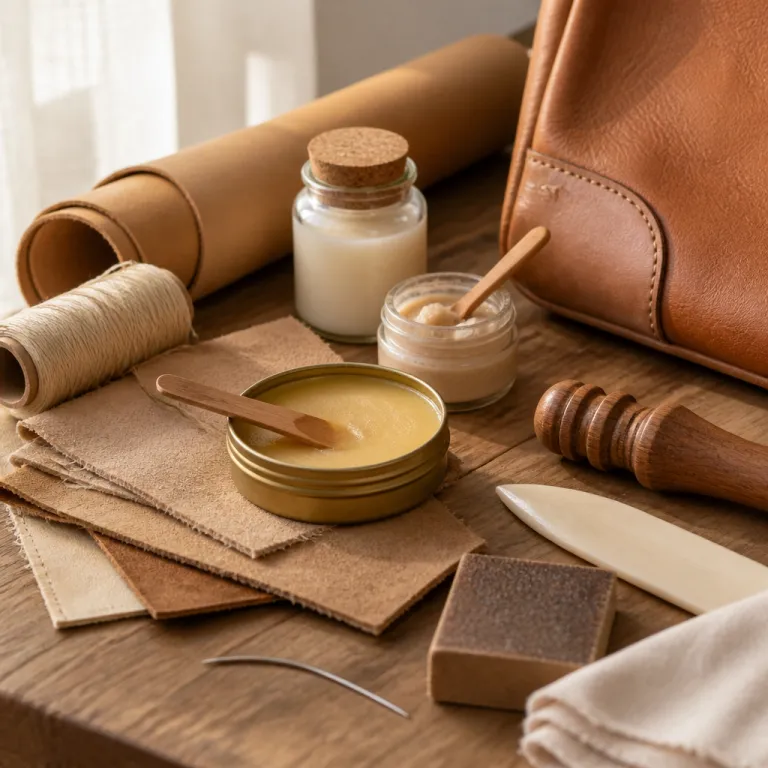
The triage mindset: reading leather damage before you reach for a kit
Every serious owner of quality leather goods eventually faces that first scratch on a favorite briefcase. Before you even think about any leather repair at home guide or reach for a repair kit, you need a calm triage system that separates cosmetic issues from structural leather damage. The way you classify the types of damage on your leather items will quietly determine whether the piece ages with character or slides into irreversible damage that no kit can truly hide.
Start by mapping the surface under good daylight and with clean hands. Light scratches and scuffs that only disturb the top finish but not the grain usually count as cosmetic damage, while deeper tears, holes, or lifted edges signal structural problems that often require professional help. Water rings, heat marks, and dye transfer sit in a grey zone where the wrong leather cleaner or leather glue can turn manageable damage types into permanent scars on leather that once looked impeccable.
Think in three clear categories for any leather repair decision. First, superficial scratches and scuffs on full grain leather or similar leather types are usually safe for careful home repair with a minimalist kit and a lint free cloth. Second, deeper cuts, open seams, or stretched handles on heavy leather goods are structural and will almost always benefit from a professional repair service rather than a do it yourself repair kit that was never designed for load bearing areas.
The third category is environmental damage, which includes water, heat, and chemical exposure. Light water spotting on robust leather can often be eased at home with a leather conditioner and patient drying, but heat damage or chemical spills on delicate leather items should push you toward professional help quickly. When in doubt, take high resolution photos of the damaged leather from several angles and send them to a trusted cobbler or restoration studio before you apply any glue, dye, or conditioner that you cannot easily reverse.
Surface scratches and scuffs: the safe end of home leather repair
Most owners reach for a leather repair at home guide the first time they see fine scratches on a briefcase flap or wallet corner. On quality leather with a healthy grain, many of these light scratches and scuffs sit only in the waxes and oils of the finish, which means gentle warmth from your fingertip can often blend the surface back into a uniform appearance. This is the rare moment when doing less will usually repair more, as long as the leather is not dry or contaminated with grit.
Begin by wiping the surface with a slightly damp, lint free cloth to remove dust that could create new scratches during rubbing. Once clean and fully dry, use the natural heat of your finger to massage along the grain direction, not across it, which helps the oils redistribute and softens the look of the damage without any kit or glue. If the mark remains visible, a small amount of color matched balm from high quality repair kits can be applied with a clean cloth in tiny circular motions, always testing first on an inconspicuous area of the same leather type.
For deeper scuffs that have removed finish but not cut into the leather itself, a more structured repair kit can help. Choose repair kits that specify compatibility with your leather type, whether full grain, top grain, or corrected grain, and avoid multi purpose kits that promise to fix every possible damage type with one universal dye. After cleaning with a dedicated leather cleaner, apply thin layers of balm or filler, letting each layer dry completely to ensure a smooth surface that respects the original appearance of your leather goods.
Surface issues sometimes hide other problems, such as wax spills or polish build up. If you suspect wax contamination around scratches, consult a specialist resource on effective techniques for removing wax stains from luxury leather goods before you attempt any leather repair. A simple three step sequence works well for many owners: first, gently soften the wax with controlled warmth; second, lift residue with a soft cloth and appropriate cleaner; third, allow the leather to dry fully before adding any conditioner or color. Removing the residue first will protect the grain from further damage and ensure that any conditioner or dye you apply later bonds evenly instead of sitting on a compromised surface.
Conditioning as repair: when moisture saves leather and when it smothers it
Many owners underestimate how often they should condition leather, especially on bags and briefcases that see daily use. Leather care specialists commonly recommend conditioning every four to six weeks for frequently handled leather items, because edges, handles, and stitching dry out faster than flat panels and show early signs of leather damage. In practice, that means conditioning sometimes functions as a subtle repair, reversing early dryness before it becomes visible damage or even small tears or holes along stress points.
Start with a gentle leather cleaner applied using a soft, lint free cloth, working in small sections and never soaking the surface. Once the leather is clean and completely dry, apply a high quality leather conditioner sparingly, focusing on areas where the grain looks slightly chalky or where the appearance has dulled from repeated flexing. Over conditioning can clog the pores of quality leather, flattening the natural grain and making future repair more difficult, so your goal is always to condition leather just enough to restore suppleness without leaving a sticky film.
There is a fine line between conditioning as repair and conditioning as damage. If you apply leather conditioner over stains, salt marks, or embedded dirt, you effectively glue the problem into the fiber structure and make later leather repair more complex for any professional. The safest approach is to treat conditioning as the final step in a sequence that starts with cleaning, then light scratch management, then a careful assessment of whether any remaining damage types need a repair kit or professional help instead of more product.
Owners who enjoy a deeper dive into conditioning strategy should study guidance on conditioning without smothering the oils and waxes that let leather breathe, which explains why timing and product choice matter as much as frequency. Used wisely, conditioner can extend the life of leather goods and reduce the need for aggressive repair kits or leather glue on stressed seams. Used carelessly, it can darken leather unevenly, alter the surface sheen, and mask early warning signs that a structural repair is overdue.
Colour loss, dyes, and why most home kits are a one way door
Colour loss is where many otherwise careful owners push a leather repair at home guide too far. A faded corner on a navy briefcase or a pale patch on a tan belt tempts you toward online dye kits that promise perfect matches, but pigment chemistry and finish types on leather are far less forgiving than marketing suggests. Once you apply a strong dye or pigment from a generic kit, reversing the result without professional help becomes extremely difficult and sometimes impossible.
Before you even consider a repair kit that includes dye, identify the leather type and finish on your leather items, because aniline, semi aniline, and heavily pigmented leathers all respond differently. Aniline leather absorbs dye quickly and unevenly, which can turn a small area repair into a large, blotchy stain that ruins the appearance of otherwise quality leather. Pigmented leather, by contrast, often requires a carefully layered system of base coat, color coat, and top coat that most consumer kits simply cannot replicate with precision.
If you decide to experiment with dye on minor damage, treat it as a last resort and work only on very small areas. Use a repair kit that allows you to mix colors to match the existing grain tone, apply with a tiny brush or sponge, and let each layer dry fully before judging the result under natural light. Never flood the surface with dye or use leather glue to trap pigment under a film, because both approaches can stiffen the leather and create a hard edge that cracks under flex, leading to new damage types that are harder to repair.
For significant color loss, widespread fading, or previous bad repairs, the most rational choice is to seek professional help from a leather restoration specialist who works with airbrush systems and manufacturer grade pigments. These professionals can strip failed home repair kits, rebuild color in thin, flexible layers, and protect the surface with appropriate top coats that respect the original grain. If you want to understand how other owners navigate this line between patina and over correction, read a candid account such as from battle scars to smooth tales, luxury leather good owners’ secret confession on scratch repairs, which illustrates how restraint often preserves more value than aggressive recoloring.
Hardware, stitching, and structural failures: where home repair should stop
Scratches on a flap are one thing; a handle that feels loose is another category entirely. When the structure of leather goods starts to fail, the stakes of any leather repair at home guide rise sharply, because a bad fix can turn manageable leather damage into a catastrophic break at the worst possible moment. Here, the decision between a small home repair and immediate professional help is less about pride and more about safety, longevity, and the quiet competence your accessories project.
Hardware issues fall into three main damage types that owners commonly face. Tarnished buckles and zippers usually respond well to gentle polishing with a soft cloth, taking care to avoid contact between metal polish and the surrounding leather, which could cause chemical damage. Loose rivets, broken zipper teeth, or distorted D rings, however, are structural problems that require either a skilled cobbler with access to compatible hardware or the original manufacturer, because improvised repair kits or glue based fixes rarely hold under real world loads.
Stitching failures deserve the same respect. Luxury makers typically use saddle stitching, where two needles pass through each hole in opposite directions, creating a line that will not unravel if one thread breaks, and this is something a domestic sewing machine cannot replicate. Hand re stitching with waxed thread can be done at home on minor areas if you already own the right tools and understand the grain and thickness of your leather items, but for handles, gussets, or weight bearing straps, a professional repair is the only option that will ensure long term integrity.
When you see tears or holes forming at stress points, resist the urge to reach for leather glue or a generic repair kit that promises to fix everything. Glue can be useful for edge repairs on non structural areas, but once the fiber structure has failed in a strap or handle, only a professional can rebuild the layers and re stitch through sound material. In these cases, the most cost effective move is often to pay for expert work once, rather than cycle through multiple repair kits that never quite restore the original strength or appearance.
The professional landscape and the quiet art of knowing when to let go
Once you accept that not every problem belongs in a leather repair at home guide, the next question is which professional to trust. Cobblers, leather restoration studios, and manufacturer service departments each occupy a different niche in the ecosystem of leather repair, and understanding their strengths helps you match damage types to the right expertise. A good decision here protects both the appearance and the structural integrity of your leather goods, while a poor one can waste money and still leave you with compromised items.
Cobblers excel at functional repairs such as stitching, hardware replacement, and reshaping, especially on bags, belts, and small leather items that see daily wear. Leather restoration specialists focus more on surface work, including deep cleaning with professional grade leather cleaner, color correction, and finish rebuilding, often using tools and kits that go far beyond consumer repair kits. Manufacturer services sit somewhere between, offering access to original components and patterns, but sometimes at a higher cost and with longer turnaround times that may not suit every owner or every leather type.
Cost should be weighed against both sentimental value and remaining lifespan. A structurally sound briefcase with moderate leather damage on the surface may justify a full professional refresh, especially if the grain and construction are superior to what you could buy new at a similar price. By contrast, a heavily worn bag with multiple tears or holes, stretched handles, and previous bad repair kit attempts may cost more to restore than to replace, and in that case, the rational choice is to retire it gracefully rather than chase diminishing returns.
This is where a clear eyed view of sunk cost becomes essential. The fact that you once paid a premium for quality leather does not mean every future repair is automatically justified, particularly if the structure is compromised beyond what leather glue, conditioner, or stitching can reasonably fix. When a trusted professional tells you that further repair will not ensure safety or a respectable appearance, taking that advice and letting go is often the most sophisticated decision a seasoned owner can make.
Building a smart home leather repair kit that respects your collection
A thoughtful owner does not wait for damage before assembling a small, focused leather repair kit. The goal is not to replace professional help, but to handle minor scratches, scuffs, and routine maintenance with confidence, using products that respect the grain and finish of your specific leather types. A well curated kit will always be modest in size, but rich in quality and precision, avoiding the clutter of gimmicky repair kits that promise miracles.
At minimum, your kit should include a pH balanced leather cleaner, a high quality leather conditioner, a few lint free cloths, and a neutral balm suitable for your most common leather type. Add a small quantity of leather glue formulated specifically for flexible leather repair, reserved only for non structural edge work where a professional has confirmed that a home fix is safe. You can also include a couple of fine sponges, cotton swabs, and a soft brush, which help you control where product lands on the surface and avoid accidental damage to stitching or hardware.
What you leave out of the kit matters as much as what you include. Skip multi color dye kits unless you have training in color matching and finish work, because these repair kits often encourage over ambitious projects that end badly for valuable leather goods. Avoid any kit that suggests using heat guns, aggressive abrasives, or thick fillers on luxury leather items, since these approaches can flatten the grain, create new damage types, and make later professional repair more complex and expensive.
Finally, store your kit where you store your most used leather items, so that small issues are addressed promptly rather than left to dry and worsen. A quick clean and condition leather session after a rainy commute can prevent water marks from becoming permanent, reducing the need for more invasive repair later. Over time, this quiet, disciplined approach to home care will keep your collection in a state where a leather repair at home guide is a reference for small refinements, not a rescue plan for avoidable neglect.
Key figures every leather owner should know
- Leather care specialists commonly recommend conditioning frequently used leather goods every four to six weeks, because high contact areas such as handles and straps dry out faster than flat panels and are more prone to early cracking. This interval is echoed in guidance from major leather care brands and manufacturer care booklets for premium bags, although exact schedules vary by climate and product.
- Industry surveys of repair workshops indicate that more than half of irreversible leather damage on luxury bags comes from inappropriate home products, including household cleaners and untested dye kits, rather than from the original wear itself. Informal polling by urban cobblers and restoration studios in cities such as New York, London, and Tokyo consistently reports similar proportions, even when sample sizes are small.
- Professional restoration of a high end briefcase in major U.S. cities often ranges from 150 to 400 dollars, while full structural rebuilds with hardware replacement can exceed 600 dollars, which is why owners must weigh repair costs against the current market value of the item. These figures are drawn from published price lists of independent restoration studios and brand service centers and are offered as typical ranges rather than fixed quotes.
- Specialist cobblers report that timely repairs on stitching and hardware can extend the functional life of a well made leather bag by ten years or more, especially when combined with regular cleaning and conditioning. Case records from long established workshops show repeat clients using the same briefcases for multiple decades when maintenance is consistent.
- Consumer behavior studies show that owners who perform light maintenance at home, such as gentle cleaning and conditioning, are significantly less likely to require emergency structural repairs, reducing long term care costs for their collections. Surveys of luxury accessory owners by market research firms regularly highlight this link between routine care and lower lifetime repair spending, even though exact percentages differ between studies.
FAQ: leather repair at home versus professional services
When is it safe to repair leather at home
Home repair is generally safe for light scratches, scuffs, minor surface wear, and routine cleaning and conditioning on structurally sound leather goods. If the damage does not affect seams, handles, or hardware, and the grain is intact, a careful owner with a simple kit can often restore appearance without risk. The moment you see deep cuts, loose stitching on weight bearing areas, or hardware issues, the repair belongs with a professional.
Can I use super glue on leather tears or holes
Household super glue is rarely appropriate for leather repair, because it dries rigid and can cause further leather damage when the material flexes. For small edge separations on non structural areas, a flexible leather glue designed specifically for leather items may be used sparingly, but only after testing on a hidden area. Any tears or holes in straps, handles, or load bearing panels should be evaluated by a professional who can rebuild the structure properly.
How do I know if my leather needs conditioning or a full repair
If the leather feels slightly dry, looks dull, or shows fine surface lines but no cracking, conditioning with a suitable leather conditioner after cleaning is usually enough. When you see deep creases that stay white when flexed, flaking finish, or visible fiber separation, the piece has moved beyond simple conditioning and may require professional repair. In those cases, adding more conditioner without addressing the underlying problem can mask symptoms while the structure continues to weaken.
Are home dye kits ever a good idea for luxury leather goods
Home dye kits can sometimes help with very small, discreet areas of color loss on non prominent parts of a bag or belt, provided you understand your leather type and test thoroughly. For large panels, complex colors, or previous bad repairs, consumer kits usually lack the control and pigment range needed to match the original finish. In such situations, a leather restoration specialist with professional equipment is far more likely to achieve a result that respects both the grain and the value of the item.
Should I send my bag to the brand or to an independent professional
Sending a bag to the original manufacturer can be advantageous when you need exact hardware, stitching patterns, or replacement panels that match factory specifications. Independent cobblers and restoration studios often offer more flexible pricing, shorter turnaround times, and a wider range of repair options, especially for mixed brand collections. The best choice depends on the specific damage, the sentimental and market value of the piece, and how important brand authenticity is to you for future resale or personal satisfaction.